Connecting your camera to your Home Network
This is for advanced users only as there are potential security issues with connecting your Raspberry Pi directly to the internet. For further information on Raspberry Pi security continue reading here.
Note: although we have found this feature to be reliable, some users have reported connection issues with home networking, further details can be found here.
01. View the SD Card

View the contents of the micro SD Card on your computer by selecting 'boot'. Within the folder find the ‘mynaturewatchcamera-wpa-supplicant.txt' file.
02. Open your text file

In 'boot', open ‘mynaturewatchcamera-wpa-supplicant.txt’ using TextEdit or similar. Tip: You may need to eject the Micro SD Card and reinsert it again before you can view the contents
03. Uncomment the WPA/WPA2
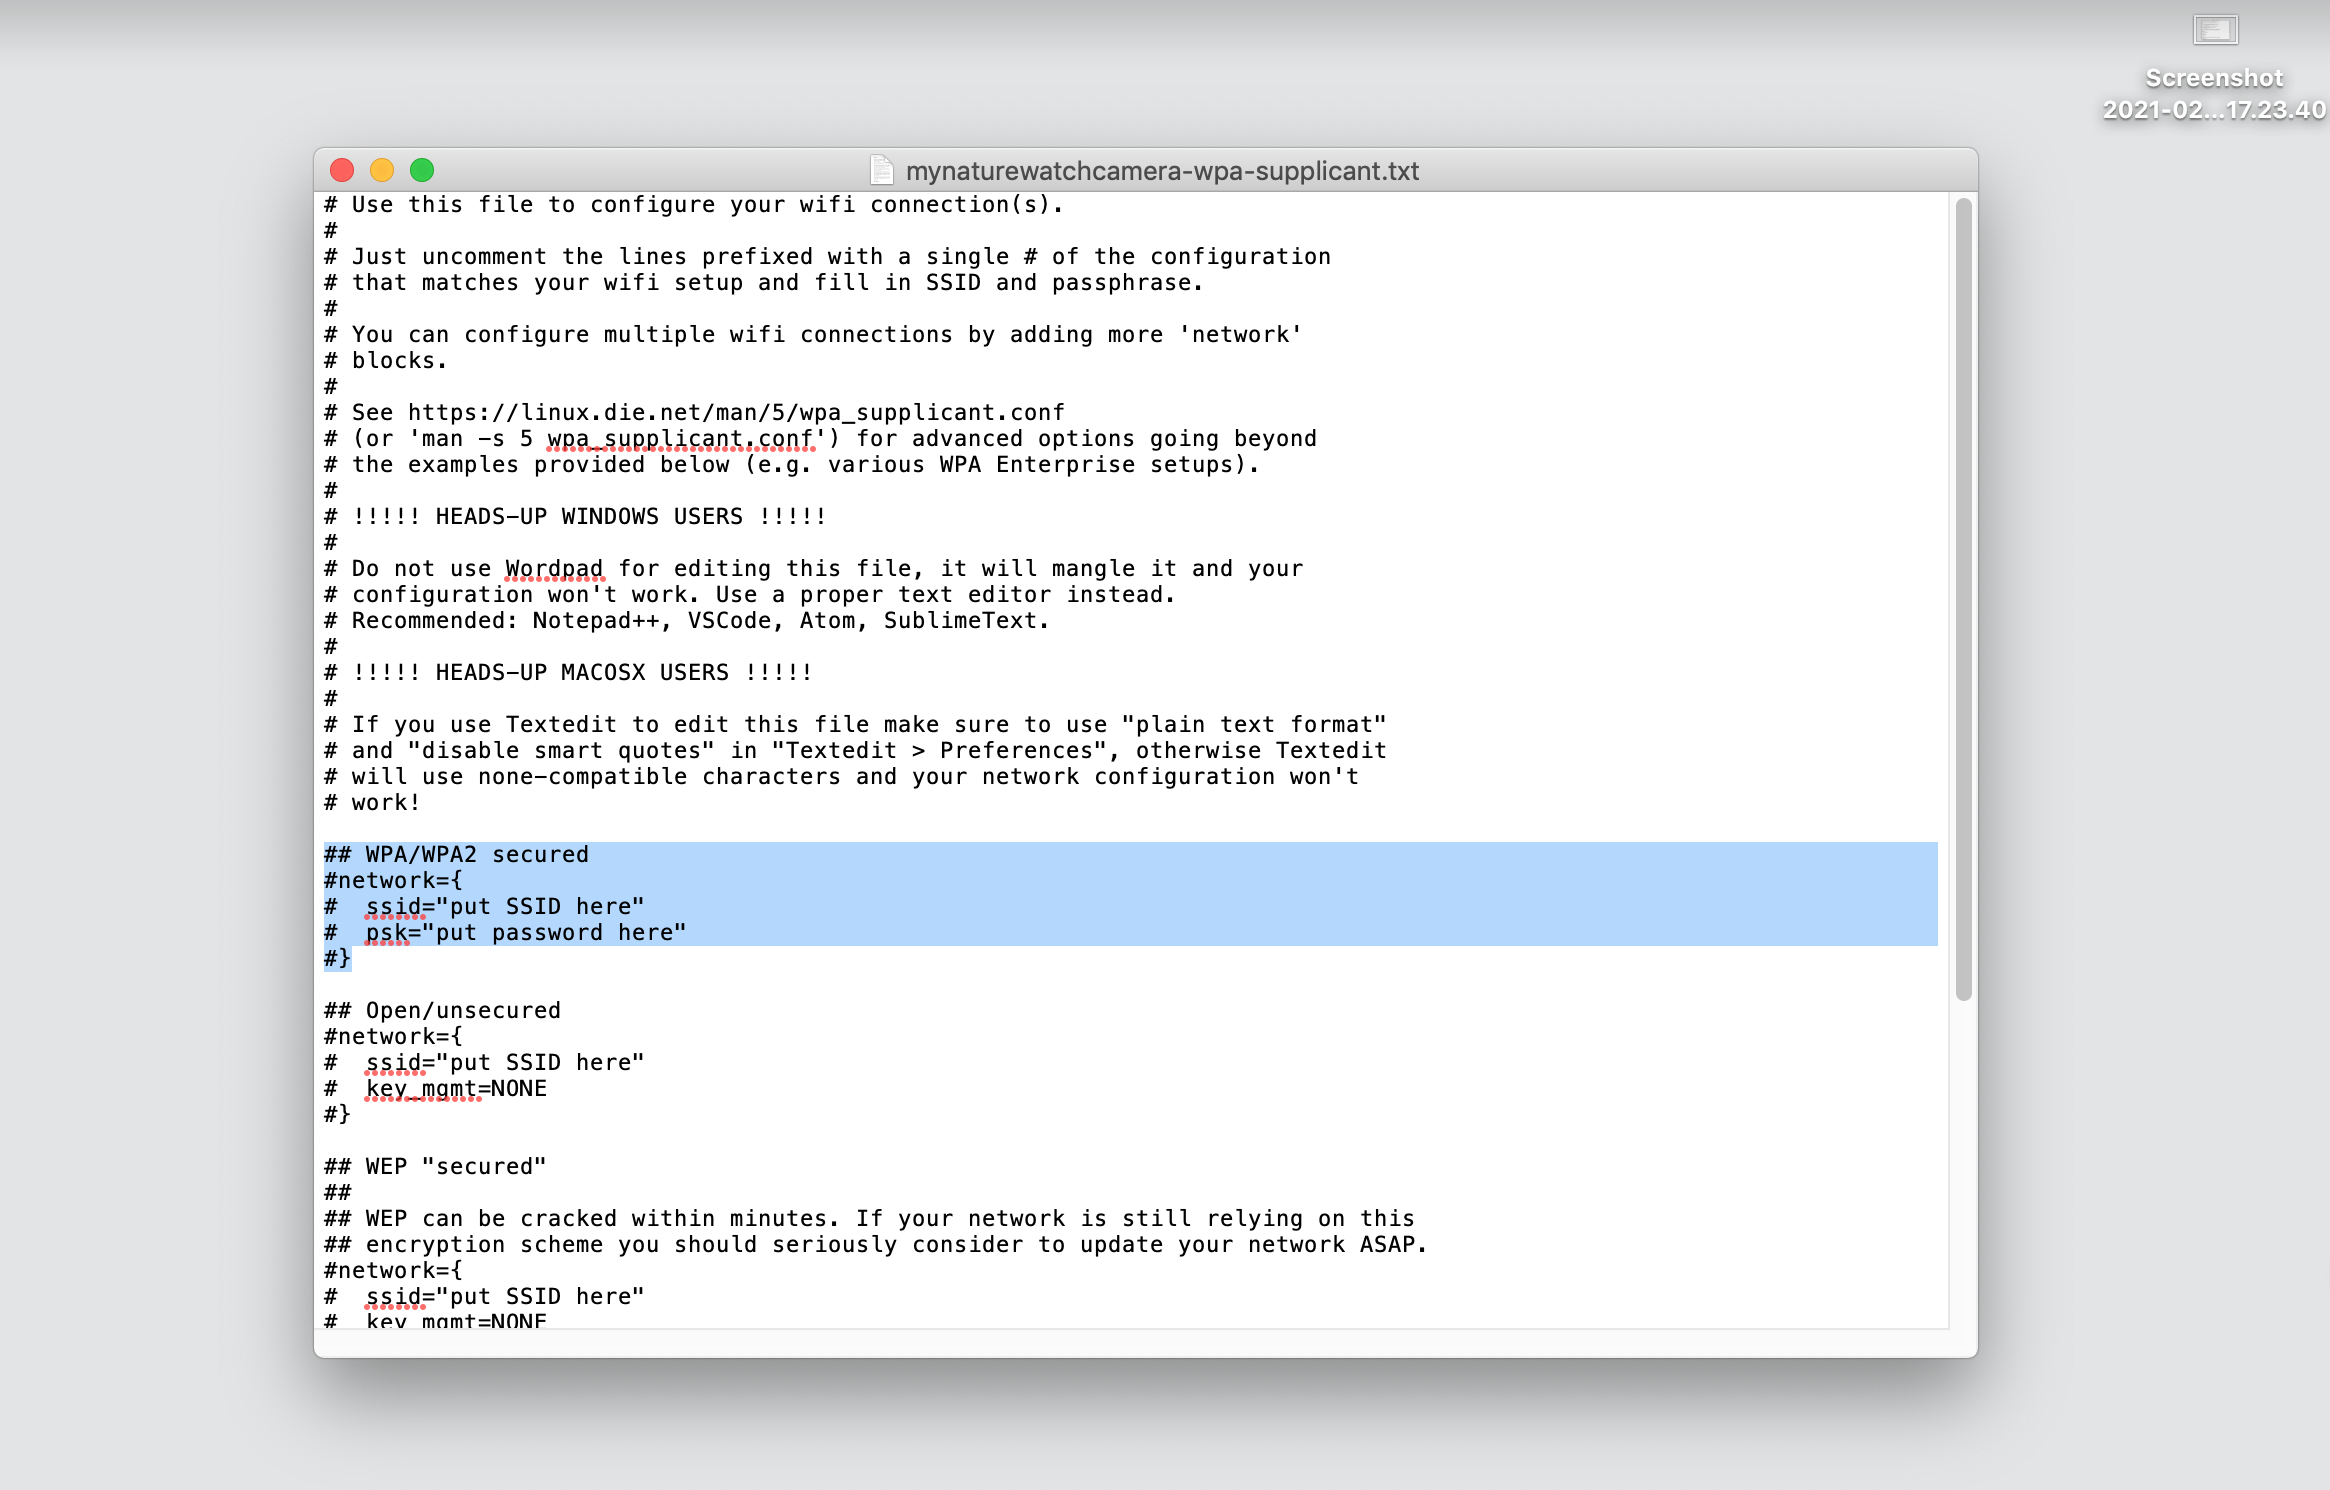
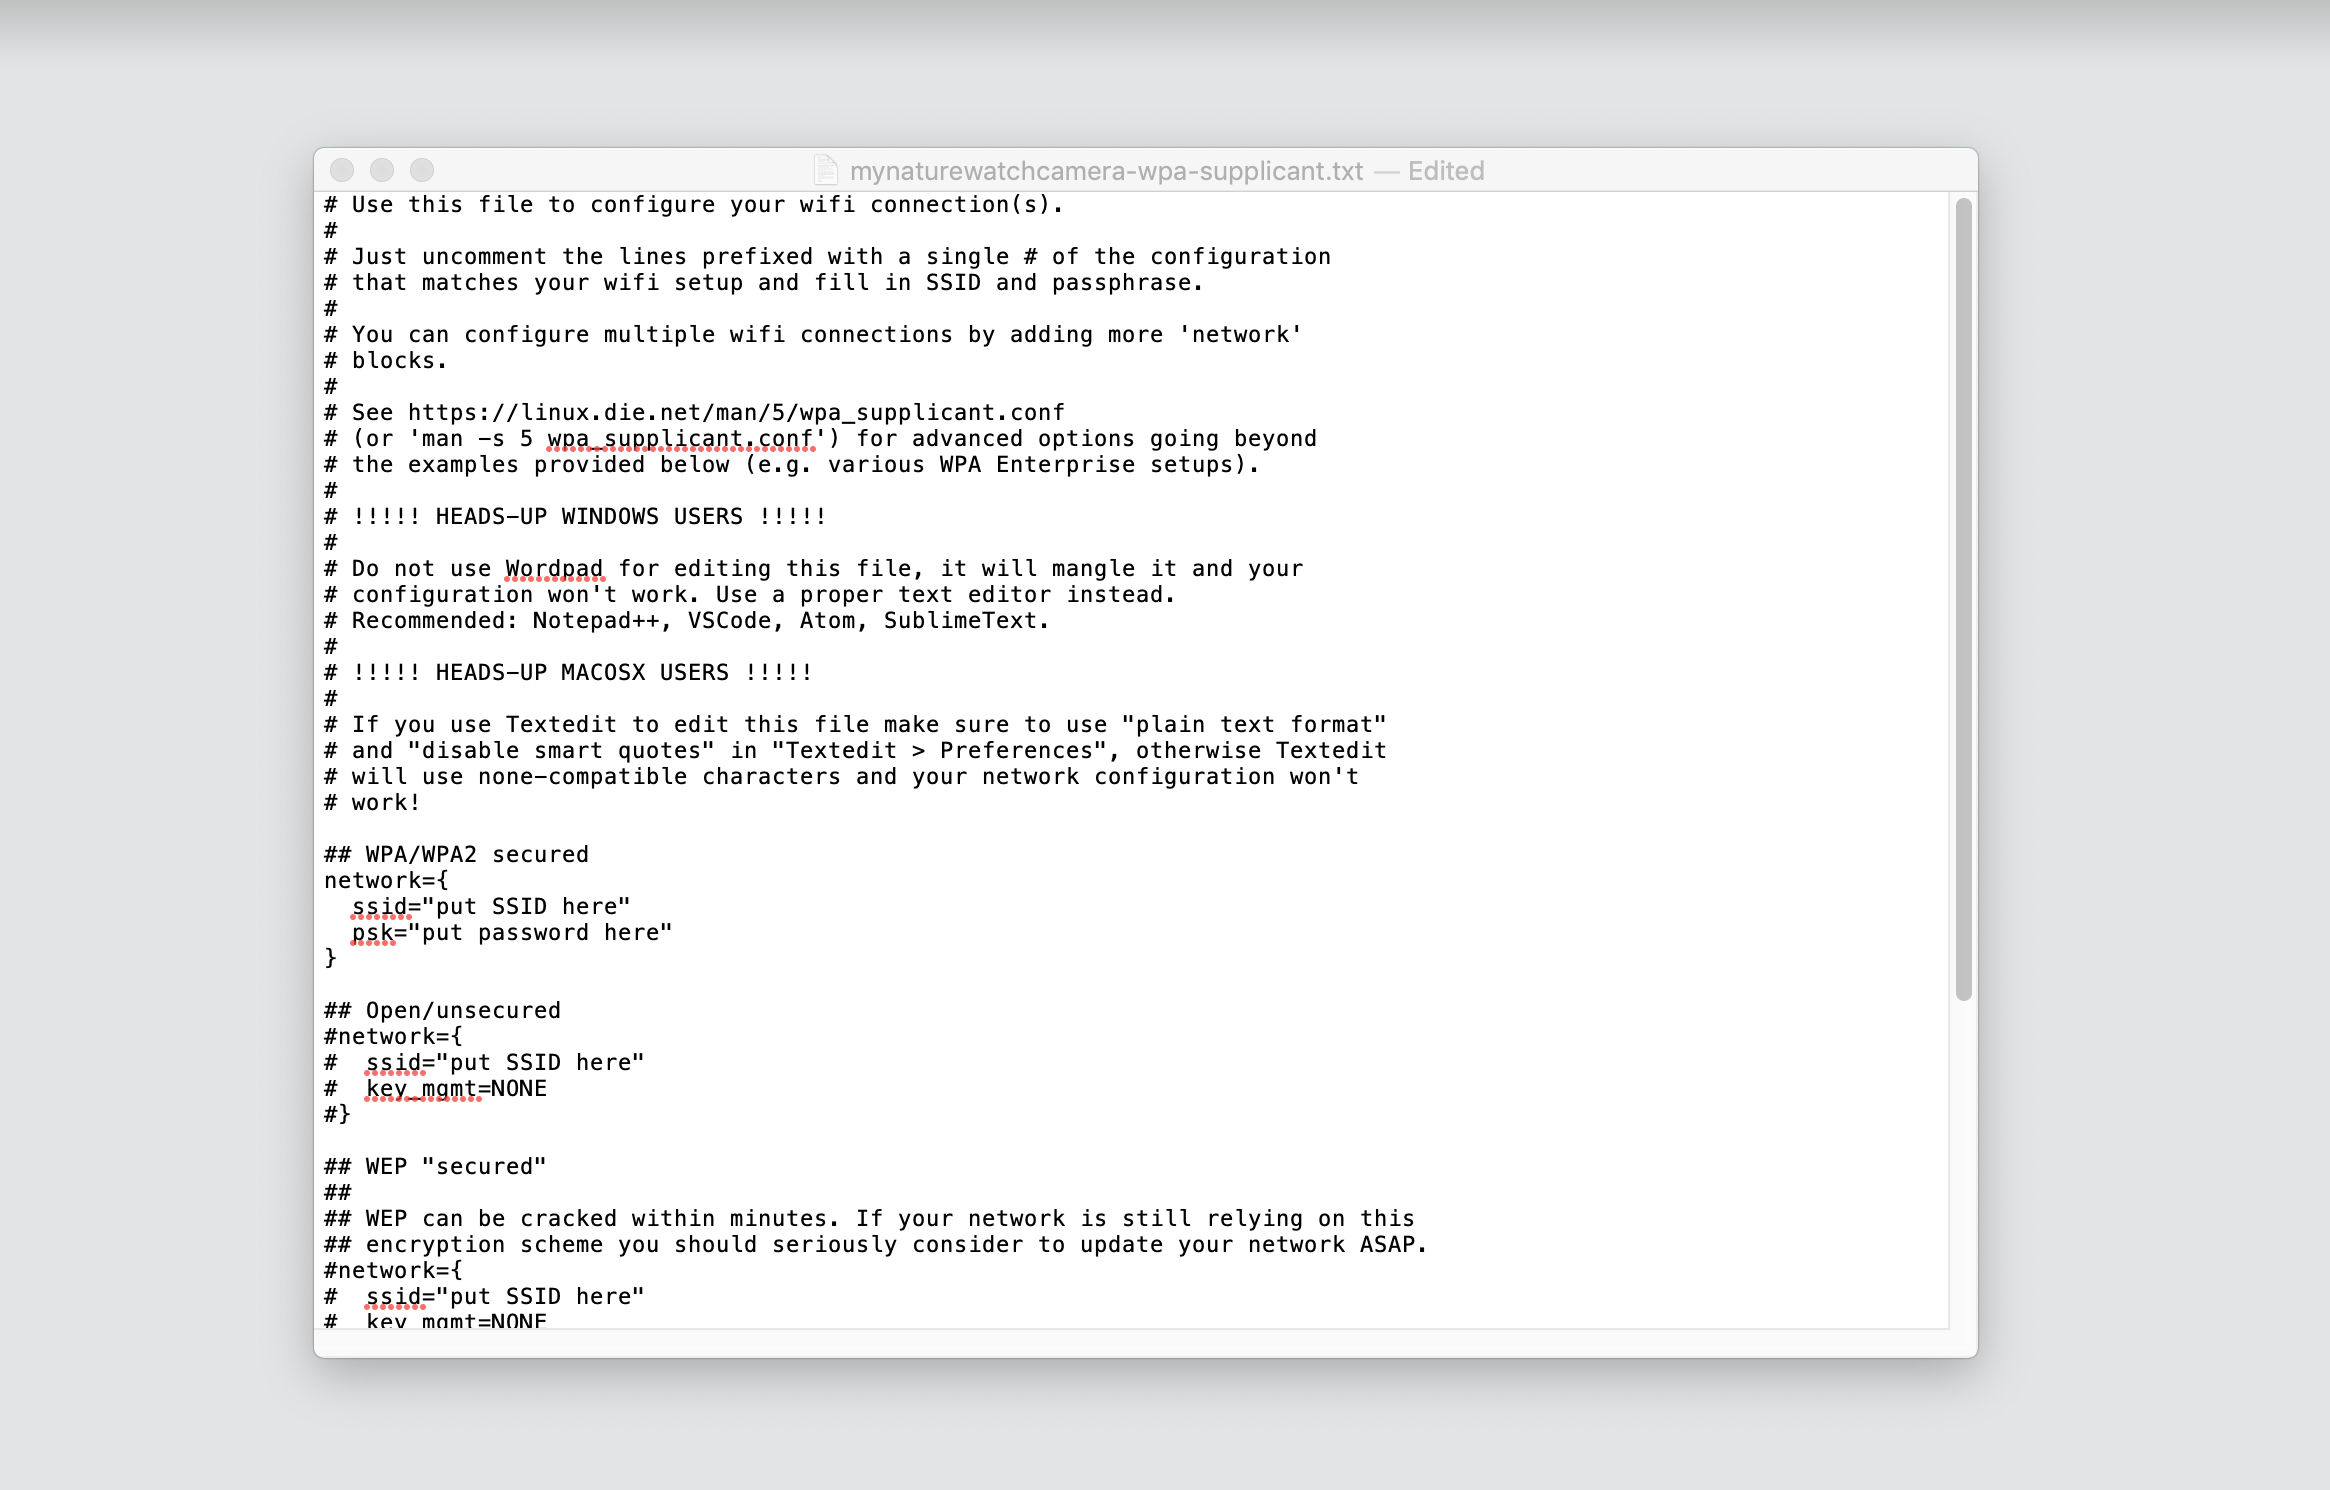
Find the text associate the WPA/WPA2 and uncomment the lines prefixed with a single # by deleting the # symbols.
04. Enter your wifi name and password
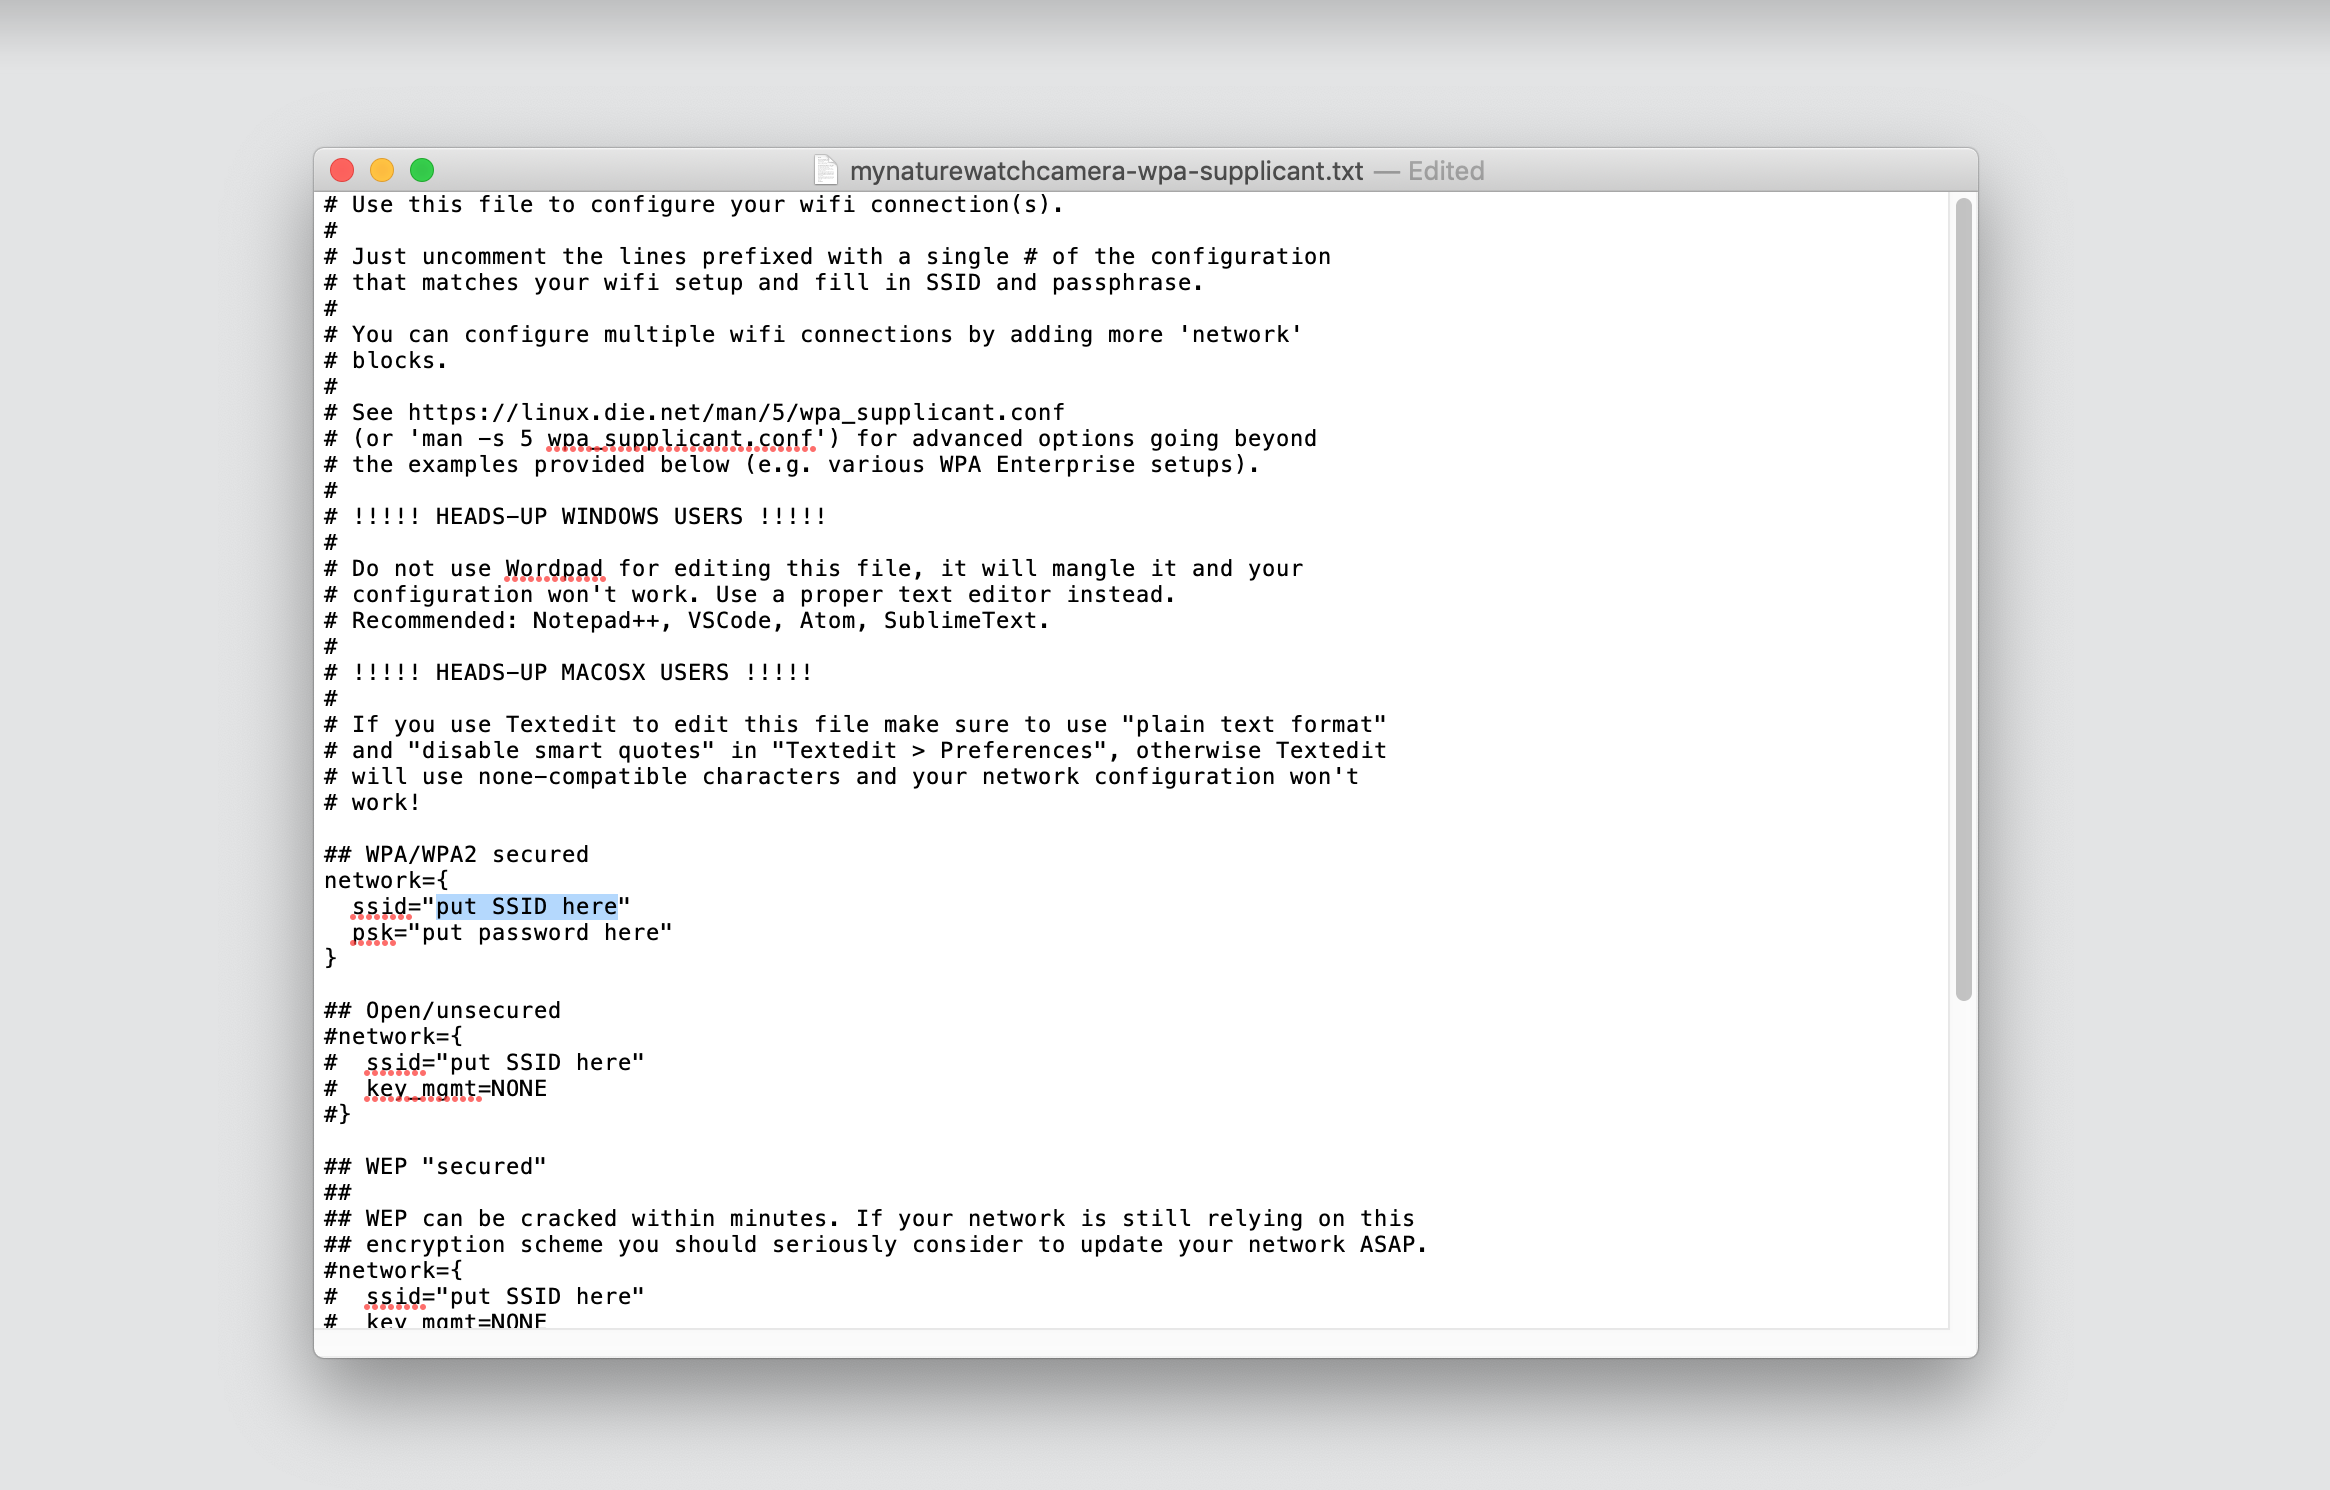
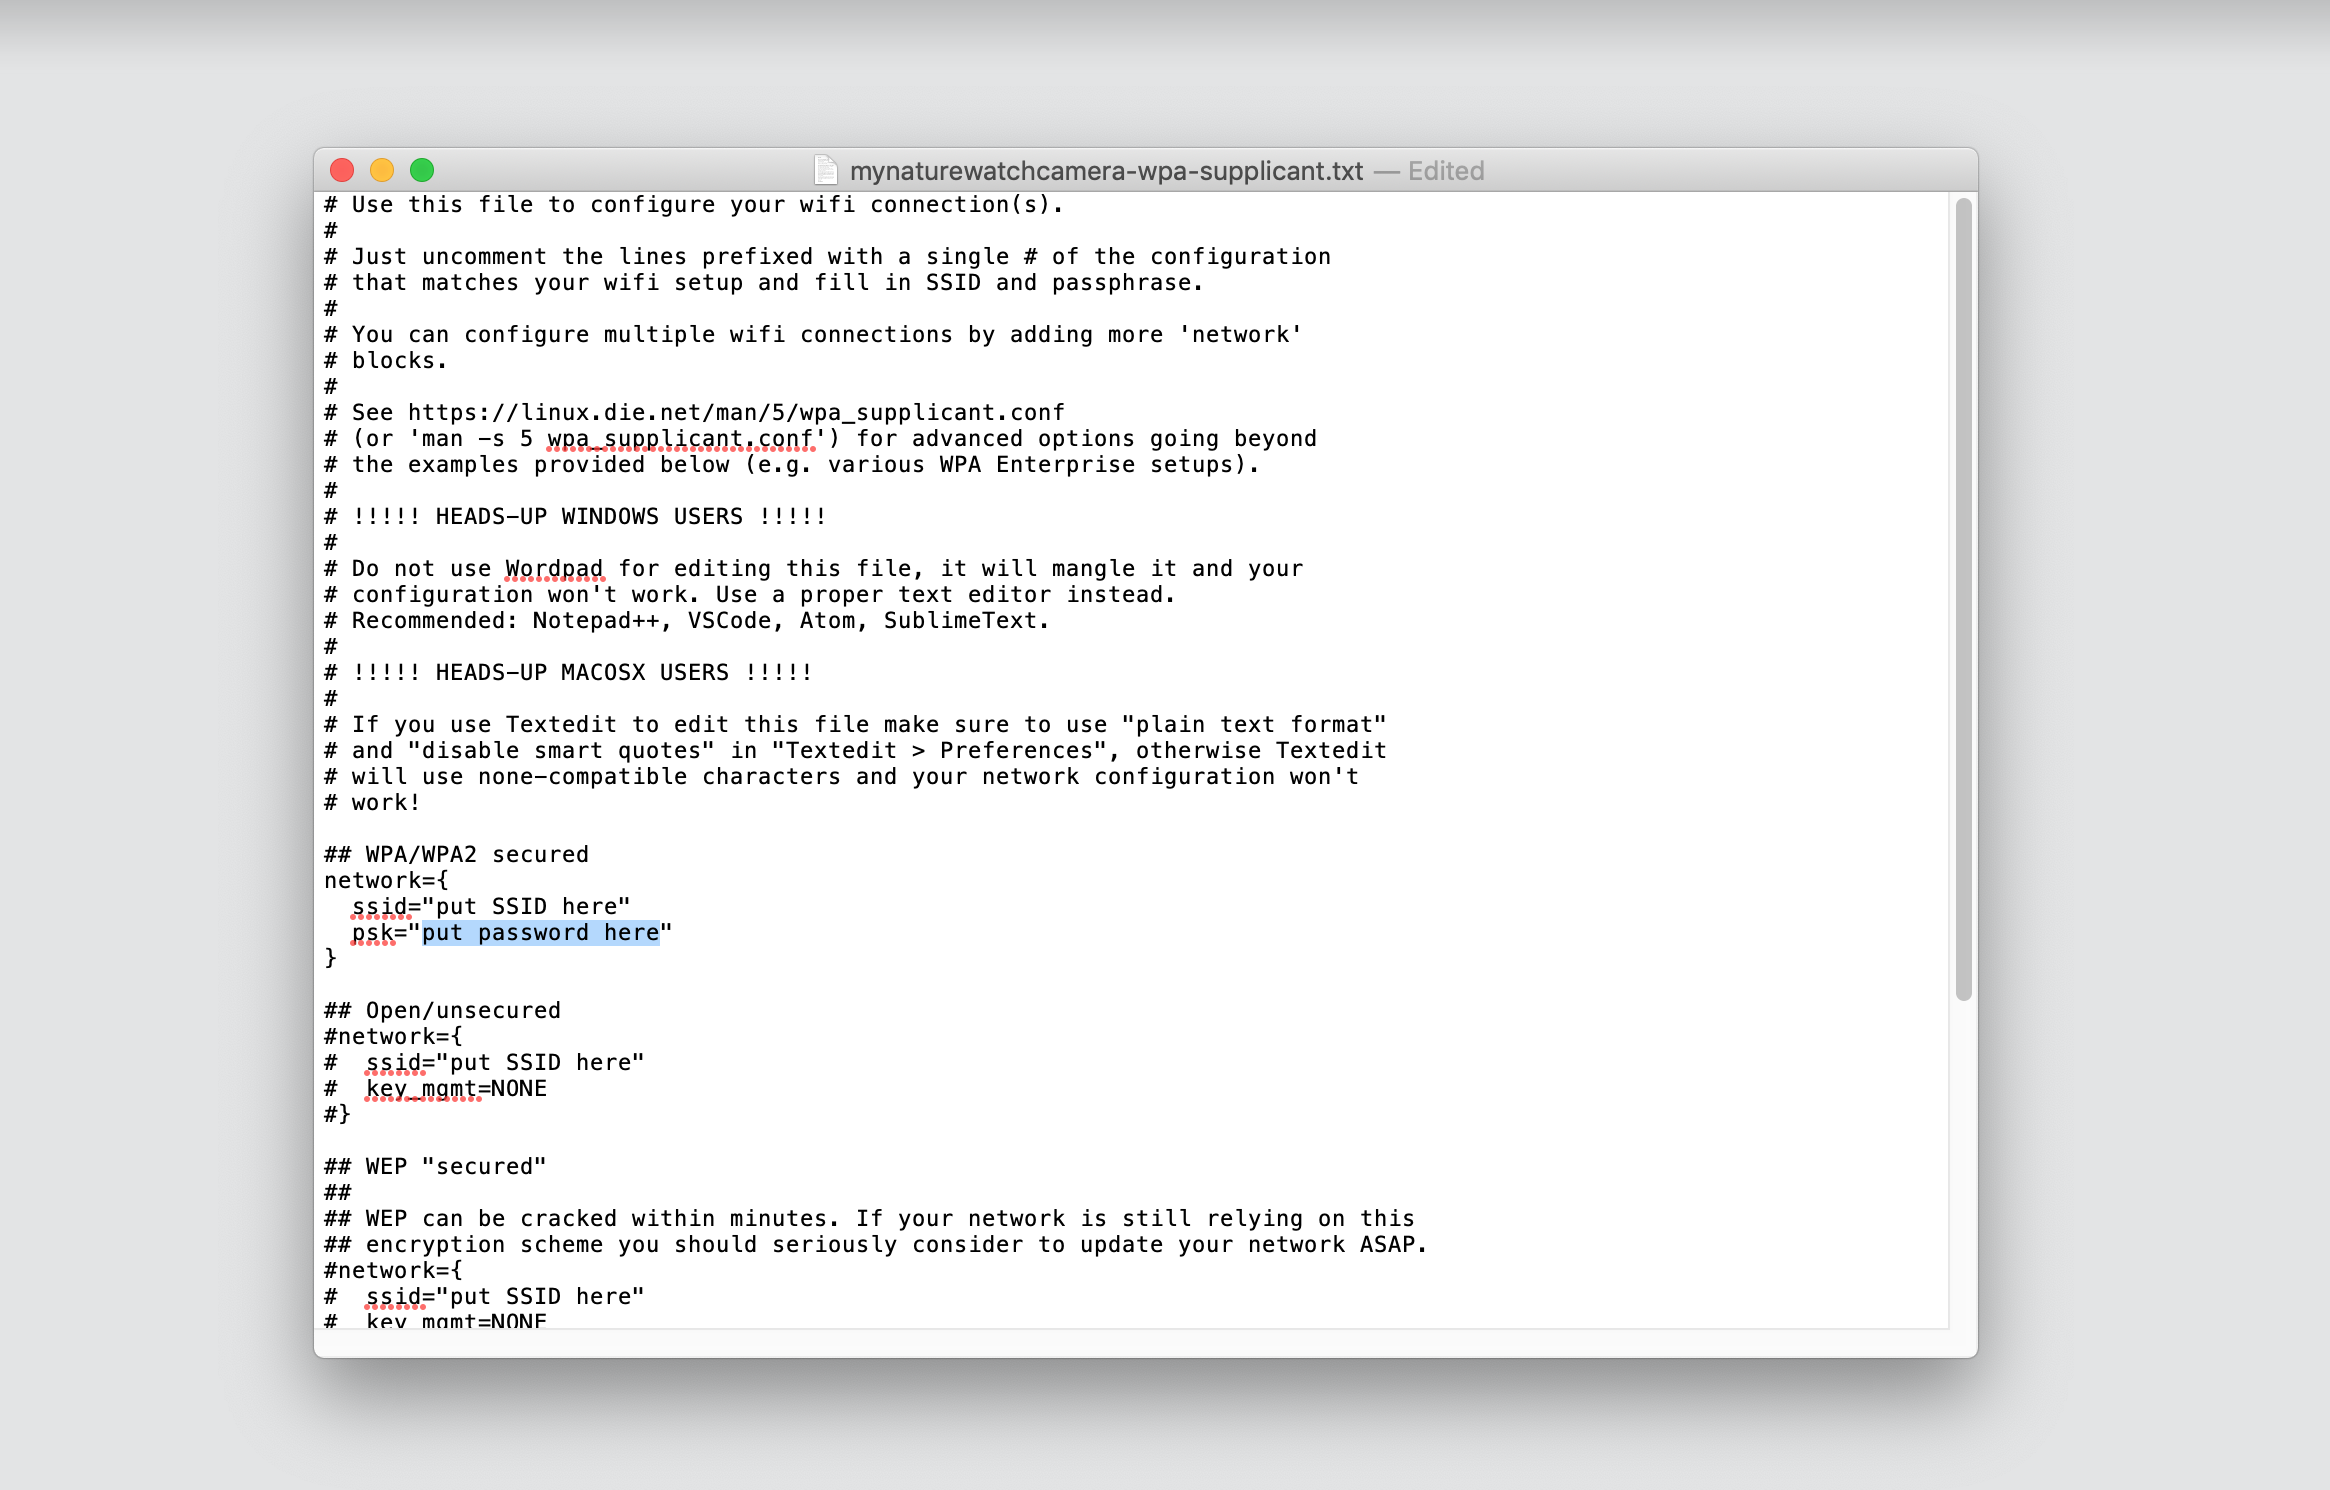
Enter you home wifi name within the “put SSID here” and enter the password within the “put password here”.
05. Set your Country

Uncomment the country your Pi is in to activate wifi in RaspberryPi 3 B+ and above. If you are within the United Kingdom it will be uncommented by default.
06. Continue with the main Instructions until ‘Connect to the wireless network’
Close the file, eject your SD card and continue with the main make your camera instruction starting from ‘Insert the micro SD card’ step until you reach the ‘Enter the IP address’ step. At this point instead of entering 192.168.50.1 you must enter the specific IP address associated with your Raspberry Pi. To find this IP address please one of methods in the Raspberry PI guidelines here.
07. Enter your IP address
Whilst connected to your home wifi network open any internet browser and enter the specific Raspberry Pi IP address.
You should see the live preview feed from your camera along with the following simple control buttons: Start photo capture, Start video capture, Settings and Gallery.
Find more information about the web interface in 'Using My Naturewatch Camera'.
08. Continue with the main Instructions
You can now refer back to the main make your camera instruction continuing on from the ‘Make the Camera Housing’ stage